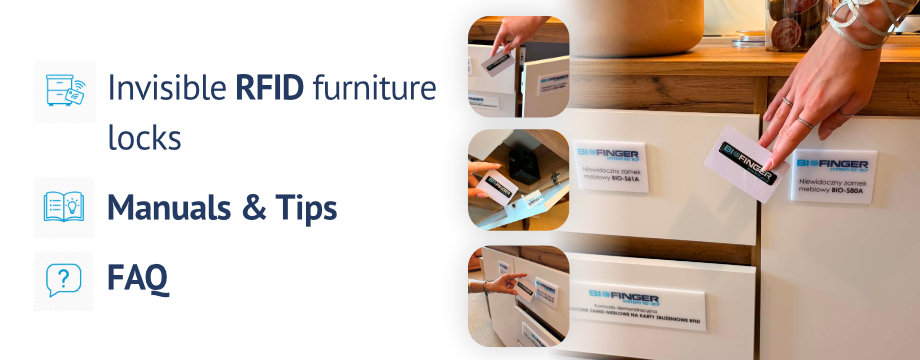
Invisible & Hidden RFID Furniture Locks – FAQ and Installation Guide
We welcome you to the BIOFINGER technical knowledge center, dedicated to invisible furniture locks for RFID cards and key fobs. We have prepared this guide to provide you with professional answers regarding the installation and daily use of electronic locks in drawers and cabinets, access management, and the operation of BIO-S series systems. Discover the advantages of hidden furniture security that combines advanced RFID proximity technology [Mifare] with complete installation discretion without drilling through-holes. Our BIO-S series solutions guarantee the safety of belongings while maintaining the intact aesthetics of office and home furniture. We provide fast shipping to Germany, Denmark, the Netherlands, France, and the entire EU.
Select the section you are interested in to jump to the detailed answers:
1. General Questions
- 1.1. What is included in the set without an external panel?
- 1.2. What is included in the set with an external panel?
- 1.3. Larger quantity of RFID locks? Card registration before installation
- 1.4. Maximum furniture front thickness (RFID range)
- 1.5. Does the invisible RFID lock work through a mirror?
- 1.6. Operating temperature and humidity conditions (RH)
- 1.7. Compatibility with Unique 125 kHz and HID cards (Dual tags)
- 1.8. Warranty and liability
- 1.9. Consequences of using the [RESET] button
- 1.10. Colored stickers (markers) – what are they used for?
2. Acoustic and visual signals (alarms) emitted by the locks
3. Power supply of invisible RFID furniture locks
- 3.1. What to do in case of a completely discharged battery?
- 3.2. Battery discharge process and safety mode
- 3.3. Constant power supply via a 6VDC switching power supply
- 3.4. Battery life and the principle of using professional batteries
- 3.5. Battery replacement schedule and calendar reminder
- 3.6. Battery types for BIO-S80A and BIO-S61A models
- 3.7. Powering multiple locks from a single source (Hubs and cables)
4. Use of invisible RFID furniture locks (private mode)
- 4.1. What is the Manager card used for? (Access and programming logic)
- 4.2. Managing multiple locks using a single Manager card
- 4.3. Can a single User card open multiple furniture locks?
- 4.4. Maximum number of users in an invisible furniture lock
- 4.5. What to do if the only User card is locked inside the furniture?
- 4.6. Door and drawer push-to-open system
5. Use of invisible RFID furniture locks (public mode)
6. RFID card registration and programming private mode
7. Installer’s guide – practical installation tips
- 7.1. Stage 0: Preparation of tools and auxiliary materials
- 7.2. Stage 1: Configuration and functionality test (so-called dry run)
- 7.3. Stage 2: Installation in a drawer (Centering and positioning)
- 7.4. Stage 3: Installation in furniture cabinets and glass display cases
- 7.5. Stage 4: Practical tips helpful for the future
1. General Questions
1.1. What is included in the set?
(invisible RFID furniture lock without an external panel)
-
Electronic RFID furniture lock (body + latch bolt or strike plate)
-
Two proximity cards:
1x Manager proximity card -
Set of screws
1x User proximity card
1.2. What is included in the set?
(invisible RFID furniture lock with an external panel)
-
Electronic furniture lock (body + latch bolt or strike plate)
-
External panel for RFID card and/or PIN code
-
Ribbon cable approx. 10cm long
-
Two proximity cards:
1x Manager proximity card -
Set of screws
1x User proximity card
1.3. When purchasing a larger quantity of invisible electronic furniture locks, we suggest that, depending on your needs and technical conditions, directly before installation:
-
register one arbitrary Manager registration card to each furniture lock
-
register all or selected User cards and key fobs to each furniture lock
1.4. What thickness can the front be so that the proximity card or key fob can open the invisible furniture lock?
Our professional RFID furniture locks are designed to penetrate furniture fronts of any minimum thickness. Advanced RFID technology easily penetrates wood, glass, and composites up to 35 mm thick (depending on the model). This allows for a completely invisible installation without drilling through holes in the front. Ultimately, the RFID range depends on the type of material: wood, MDF, glass.
1.5. Will the invisible RFID furniture lock work through a mirror?
The electronic furniture lock will not work through a mirror because of the aluminum foil layer, which dampens the range of radio waves emitted by the RFID lock.
To open such furniture, an invisible furniture lock with an external panel must be used.
1.6. Under what conditions can the invisible RFID furniture lock operate?
Professional BIO-S series furniture locks are adapted to work in a wide range of environmental conditions, allowing for their safe installation not only in offices but also in facilities with variable temperature and humidity:
-
Operating temperature: from -15°C to +65°C (the lock can operate in unheated rooms).
-
Permissible ambient humidity: range of 10% ~ 90% RH (relative humidity).
-
Anti-static protection: up to 15KV (air discharges) and 8KV (contact discharges), which protects the advanced electronics from damage caused by electrostatic charges.
1.7. Can the invisible RFID lock work with my access cards of a different standard (e.g., Unique 125 kHz or HID)?
Our professional RFID furniture locks operate in the Mifare 13.56 MHz standard. If your company uses cards with a different frequency (e.g., Unique 125 kHz, HID, or others), we offer a practical solution:
-
Self-adhesive RFID tags (stickers): they can be stuck onto any existing proximity card, phone, or other object.
-
Dual solution: the attached tag allows you to register the “given object” (e.g., a smartphone) in the memory of the BIO-S series furniture lock, allowing you to use a single carrier for multiple purposes.
1.8. How long is the warranty period for invisible electronic BIO-S series furniture locks?
The warranty period for professional BIOFINGER brand invisible furniture locks from the BIO-S61A, BIO-S80A, BIO-S90A, and BIO-S123A series is 24 months. The exception is the budget model BIO-S8080A, which is covered by a 12-month warranty period.
Important!
The warranty does not cover:
-
unskilled installation of the electronic furniture lock (this also applies to improper alignment of the lock body with the locking latch bolt),
-
failure to follow all recommendations contained in this user manual,
-
mechanical damage resulting from forced opening of the furniture when the batteries in the lock have been completely discharged.
1.9. What happens after pressing the [RESET] button on the lock body, and what are the consequences?
Using the [Reset] button (by pressing it for about 2 seconds) immediately restores the BIO-S series lock to factory settings. This operation entails two key system changes:
-
complete memory wipe: all registered cards and key fobs – both administrative Manager Cards and User Cards – are deleted from the lock’s memory.
-
change of operating mode: the furniture lock automatically returns to its default settings (public mode), meaning the previously configured private operating mode is lost.
Attention!
Critical procedure after performing a reset:
A strict sequence of configuration actions must be maintained, which differs depending on the device model:
-
for models BIO-S61A, BIO-S80A, BIO-S90A, and BIO-S123A:
Step 1: Private mode ➔ Step 2: Manager Card ➔ Step 3: User Cards. -
for model BIO-S8080A:
Step 1: Manager Card ➔ Step 2: Private mode ➔ Step 3: User Cards.
1.10. What are the small, round, and colored stickers (markers) included with the furniture lock used for?
The stickers, i.e., markers in white, red, blue, and yellow, are an optional element of the kit. They are used to precisely mark the location where the RFID card or key fob should be presented on the outside of the furniture front. Their use offers the following benefits and limitations:
-
marking the proximity point: the markers function as a visual indicator, making it easy for the user to correctly present the proximity card precisely at the spot where the RFID reader is mounted inside.
-
optional use: applying the markers is entirely optional – if your priority is to maintain complete discretion of the hidden lock and an uninterrupted aesthetic of the furniture, the front can be left completely free of any markings.
-
availability of markers: the colored stickers are included in the kit only with the following lock series: BIO-S61A, BIO-S80A, BIO-S90A, and BIO-S123A (they are not included with model BIO-S8080A).
2. Acoustic and visual signals (alarms) emitted by the locks
2.1. What do the individual acoustic and visual signals emitted by the invisible furniture lock mean?
Professional hidden furniture locks from the BIO-S61A, BIO-S80A, BIO-S90A, and BIO-S123A series communicate with the user via an advanced signaling system, which allows for real-time monitoring of the device status:
-
Green LED + 1 signal (di): access granted. Correct opening with a registered User card.
-
Red LED (2x) + 2 signals (di-di): access denied. The lock detected an unauthorized or unregistered RFID card.
-
Blue LED + a series of 8 double signals (di-di): low voltage alarm. With each opening, the lock emits a very clear audible and visual warning. This is a signal that the batteries are close to being discharged and require immediate replacement. From the moment of the first alarm, the lock will still operate about 1000 times.
-
Red LED + 5 quick signals (di-di-di-di-di): active safety lockout (so-called Locking Protection). After 5 unsuccessful attempts, the RFID lock will automatically lock for 5 minutes and ignore all User cards. The lock automatically returns to normal operation after 5 minutes. It is also possible to unlock the lock immediately before this time using a Manager proximity card.
-
Continuous beep (diii): open alarm. The lock signals that the drawer or cabinet remains open for longer than 30 seconds. The alarm can be permanently disabled (or re-enabled) by pressing functional buttons 1 and 2 on the body of the RFID lock simultaneously. Note that this option is only available in the lock’s private operating mode.
-
LED off: standby mode. The lock is ready to operate, conserving battery power.
Knowledge worth sharing 😉
Preparing this precise information took us a lot of time, but we do it with passion to make it easier for everyone to find the best solution. If you find our tips helpful, please share the link to this FAQ page or our page about invisible cabinet locks with your friends or on social media.
Your share is the best way to say thank you. Thank you!
3. Power supply of invisible RFID furniture locks
3.1. What to do if the batteries in the furniture lock are completely discharged?
Such a situation can happen mainly in specific cases – for example, when batteries are inserted into the RFID lock and then the furniture is not opened for a very long time (e.g., for 5 years). Only in such a case can the batteries become completely discharged.
In the event of a complete battery discharge, the electronic furniture lock will remain locked.
To gain access to the contents, we suggest drilling a hole of an appropriate diameter (using a hole saw) in the least visible place on the furniture front, allowing you to insert your hand inside the cabinet or drawer. This will allow for manual replacement of the batteries with new ones, unscrewing of the latch bolt, or dismantling of the lock body.
Important!
During normal, regular use of the electronic RFID furniture lock, if the user does not ignore the alarm signals, such a situation will never occur.
Every invisible furniture lock from the BIO-S series has advanced warning systems that inform the user about the battery discharge process well in advance (acoustic and visual signals with each opening).
A detailed description of the warning systems and the battery replacement procedure can be found in our FAQ under point 3.2.
3.2. What happens if the battery voltage level drops?
Our solutions protect users from the consequences of a complete battery discharge. The alarm systems and safety mode are closely adapted to the lock model and its type of power supply:
-
for models BIO-S80A, BIO-S8080A, BIO-S90A, and BIO-S123A (4x AAA power supply): low voltage alarm triggers below 4.5V (blue LED and di-di sound). Safety mode occurs at 4.0V.
-
for model BIO-S61A (1x CR123A power supply): low voltage alarm triggers below 2.5V. Safety mode occurs at 2.0V.
3.3. Can a constant power supply be connected to the lock?
Yes. Each of our locks features an option for constant power supply instead of batteries using an external 6VDC switching power supply. This is an ideal solution for locations with very high traffic.
3.4. How long do batteries last in an invisible furniture lock?
Thanks to the use of advanced energy-saving technology, our electronic RFID furniture locks are characterized by extremely low power consumption. Standby power consumption is less than 100µA, while dynamic power consumption during operation is less than 200mA. With average use (approx. 10-15 openings per day), a set of high-quality batteries lasts for a period of 10 to 14 months (approx. 15,000 cycles).
Important!
3.4.1 To ensure maximum reliability, we suggest using only brand new batteries from professional manufacturers (e.g., Industrial by Duracell).
If used or partially discharged batteries are used, the invisible furniture lock may not be able to correctly generate the low voltage alarm (blue LED and di-di sound), which may lead to the lock suddenly jamming without prior warning.
3.4.2 For full safety, we suggest setting a calendar reminder to periodically – e.g., once every 3 months or according to the intensity of use – replace the batteries in each invisible lock with brand new ones.
3.5. What batteries are needed to operate the BIO-S80A and BIO-S61A models?
The universal BIO-S80A model is powered by 4 AAA (1.5V) alkaline batteries. The ultra-compact BIO-S61A model uses 1 CR123A 3V lithium battery. We suggest using only new batteries from professional manufacturers.
3.6. The furniture lock or glass display case lock cannot be turned on, and the lock does not react to the proximity card.
Batteries are not included in the set. Make sure you have correctly inserted new batteries into the lock.
3.7. Can multiple furniture locks be powered from a single power supply?
Yes, this is possible. It can be achieved in two ways, depending on the installer’s needs and skills:
-
Self-installation: requires preparing two-wire electrical cables yourself, crimping appropriate plugs on each cable, and connecting them using a terminal block. The technical specifications of our power supply are 6VDC/2A, allowing for stable power supply for 5 to 10 furniture locks (the final number depends on how many locks are opened at the exact same moment).
-
Professional installation (ready-to-use solution): to simplify installation as much as possible and ensure its aesthetics, our company offers dedicated mounting accessories. You can purchase a DC switching power supply, special 7-port USB-DC hubs, and ready-made power cables with a length of 1 or 2 meters from us. This solution eliminates the need for manual plug crimping and allows you to create a professional plug & play power bus in a cabinet or office bookcase.
Knowledge worth sharing 😉
Preparing this precise information took us a lot of time, but we do it with passion to make it easier for everyone to find the best solution. If you find our tips helpful, please share the link to this FAQ page or our page about invisible cabinet locks with your friends or on social media.
Your share is the best way to say thank you. Thank you!
4. Use of invisible RFID furniture locks programmed to operate in private mode
4.1. What is the Manager card used for?
The Manager registration card serves as the master administrative identifier dedicated to managing electronic furniture locks from the BIO-S series. Its exploitation process requires taking two key operational aspects into account:
-
Programming procedures: the Manager card is used to register new User Cards in the device’s memory.
-
Emergency opening: rights to emergency opening of the lock depend on the configured operating mode. In the private operating mode, the Manager card does not have the authority to open the furniture lock. However, in the public operating mode, the Manager card does have the authority for emergency opening.
Important!
We recommend storing the Manager card in a dedicated high-security location (e.g., a safe or another room). We strongly advise against leaving the Manager card inside the furniture operated by the given electronic lock. In case of losing the User card, the Manager card is the only tool that allows access reconfiguration – leaving it inside the locked furniture prevents non-invasive technical intervention.
4.2. When purchasing a larger number of invisible furniture locks for an office, do I need to use a separate Manager card for each device?
There is no such necessity. BIO-S series furniture locks are fully scalable, allowing for significant optimization of access management. When installing multiple locks in one facility (e.g., in rows of office cabinets or staff lockers), we strongly suggest registering at least one common Manager card for all locks. This solution offers specific benefits:
-
Simplicity of administration: a single administrative card allows for instant registration of new employees’ User Cards for any cabinet, drawer, or display case in the company.
-
Time-saving: the administrator does not need to match a specific service card to a given piece of furniture – one identifier manages the entire system of RFID locks.
-
Security: storing a single master Manager card in a secure place (e.g., in a safe) is much easier and safer than managing dozens of separate cards for each individual lock.
4.3. Can a single User card open multiple electronic furniture locks?
Yes, one or several User cards can be registered to any number of invisible furniture locks.
4.4. How many users can one lock support?
Up to 30 proximity cards or key fobs can be registered to each invisible furniture lock.
4.5. What to do if the only User card is locked inside the drawer/cabinet?
If a Manager card is available (i.e., it has not been locked inside the furniture), it should be used to register a new, additional User card, which will allow for non-invasive unlocking of the RFID lock. Otherwise, we suggest drilling a hole of an appropriate diameter in a suitable place on the furniture front or next to it, so that the card can be retrieved from inside, avoiding forced prying of the door.
4.6. Do the invisible furniture locks feature a door pushing system?
Yes, they feature a push-to-open system. After holding the RFID card, the mechanism’s spring slightly pushes the furniture front out.
5. Use of invisible RFID furniture locks programmed to operate in public mode
5.1. How to register an emergency opening card in the BIO-S8080A series furniture lock?
You must register a Manager card, which in public mode is used for emergency opening.
Important!
1. Only one Manager card can be programmed for the BIO-S8080A lock.
2. Up to 10 Manager cards can be programmed for the other lock series.
6. Registration of Manager and User proximity cards/key fobs and programming private mode in BIO-S series locks
Correct configuration of the electronic invisible BIO-S series furniture locks is a crucial stage that must be carried out directly before mounting the devices in the target furniture. This allows for defining access privileges in the device’s memory and setting the desired operational logic of the furniture locks.
Before you begin – key technical tips:
-
Desk tests: all registration procedures and lock operating mode changes should be performed on a desk (so-called dry run), with the latch mechanism open, to have 100% certainty that the system is working properly before closing the cabinet.
-
Influence of the [RESET] button: remember that using the reset button restores factory settings, which means the RFID lock must be reprogrammed to operate in private mode, along with all cards (Manager and User).
-
Differences in procedures: special attention should be paid to the model of your lock. While for most BIO-S series models the procedure begins with setting the operating mode, the budget BIO-S8080A model requires registering the Manager card first, which is necessary for later confirming the choice of private mode.
6.1. Setting the furniture lock to operate in private mode:
For models: BIO-S61A, BIO-S80A, BIO-S90A, and BIO-S123A
for 2 seconds
+ green LED
SET
For model: BIO-S8080A
three times
+ blue LED
twice
SET
6.2. Registration of the administrative Manager Card:
The Manager card is used for managing users. In the private operating mode of the RFID lock, it does not have rights for emergency lock opening.
for 2 seconds
starts flashing
RFID card close
SAVED
6.3. Registration of the User Card:
Standard card for daily opening of a cabinet or drawer. User card registration procedure using the Manager card:
once
starts flashing
USER card close
SAVED
Tip!
As long as the green LED flashes, you can register subsequent User cards one after another (up to 30 units).
7. Installer’s guide – practical installation tips
Stage 0: Preparation of tools and auxiliary materials
In most cases, the following set of tools is completely sufficient for the correct installation of invisible electronic BIO-S series furniture locks. However, it should be remembered that installing an invisible lock in different types of furniture (drawers, cabinets, display cases) requires an individual approach from the installer and precise fitting of the components to the specific furniture structure.
-
Screwdriver with a set of bits and a thin drill bit (approx. 2 mm) for making pilot holes for the screws.
-
Hammer and a long nail – useful for marking (punching) screw points, especially when the main lock body and latch bolt are already pre-positioned on double-sided foam tape.
-
Caliper or tape measure – precise measurement of the latch bolt axis relative to the lock body is key to correct locking.
-
Spirit level – to maintain perfect installation alignment vertically or horizontally.
-
Double-sided foam tape – essential for pre-positioning lock components before final screwing.
-
Pencil – for marking mounting points on the furniture board.
-
Degreaser (e.g., isopropyl alcohol) – to prepare the surface for the double-sided foam tape.
Stage 1: Configuration and functionality test (so-called dry run on a desk)
Before you proceed with any work directly on the furniture, always perform a full functionality test of the device on a desk:
-
Factory readiness: remember that in each new set of the BIO-S series, one Manager card and one User card are already factory-registered and ready for use. All other additionally purchased proximity cards and RFID key fobs must be programmed on your own at this stage, in accordance with the attached user manual.
-
Power supply: use only brand new 1.5V AAA alkaline or 3V CR123A lithium batteries (depending on the model) from a professional and reliable manufacturer.
-
Card management: when purchasing a larger quantity of BIO-S series furniture locks, this is the best moment to assign specific user cards to individual devices while still at the desk and check their operation. This will prevent mistakes after the locks are mounted in the target cabinets.
-
Lock verification: hold the User card close to the body and check if the mechanism is unlocked and the latch bolt pops out.
Stage 2: Installation in a drawer (centering and positioning)
Once you are sure that the electronic furniture lock operates correctly, you can proceed with the work on the furniture. In the case of drawers, maintaining the alignment of the mechanism is crucial:
-
Location selection: the main lock body is best mounted centrally in the middle (along the drawer’s axis of symmetry). This guarantees an even distribution of the ejector spring’s force and prevents the front from “skewing” during opening.
-
Any position: both the lock body and the latch bolt (strike plate) can be mounted in any orientation: vertical or horizontal, depending on the available space and drawer construction.
-
PROFESSIONAL TIP: to perfectly align the body with the latch bolt, use strong double-sided foam tape first. This allows for precise centering of the latch bolt relative to the hole before finally tightening the screws.
-
ATTENTION: when performing closing tests on the double-sided foam tape, absolutely make sure that the batteries are inside, so you can open the lock with the card without having to forcefully tear the components off the furniture board.
Stage 3: Installation in furniture cabinets and glass display cases (general principles)
For doors opening traditionally on hinges, the operating angle of the front and technical clearances must be taken into account:
-
We mount the main lock body on the side wall of the cabinet, and the latch bolt catch on the inside of the front in any position (vertical or horizontal).
-
Press distance: the lock must be positioned so that when the front is closed, there is a minimal clearance (approx. 1-2 mm). This is essential to be able to lightly press the front to release the spring lock (push-to-open system) after holding the RFID card close.
-
PROFESSIONAL TIP: here, too, we recommend pre-positioning on double-sided foam tape with active power in the lock during door closing tests.
Stage 4: Practical tips helpful for the future
-
Technical hole: it is worth drilling a small hole with a diameter of approx. 8 mm in an inconspicuous place, enabling the connection of a 6VDC power supply in case of complete battery discharge.
-
Mechanical resistance vs. battery life: make sure that the latch bolt enters the hole in the lock body completely freely. If the latch bolt rubs against the housing or encounters mechanical resistance, the current consumption by the motor increases from approx. 220mA to as much as 350mA (so-called stall current). This situation can reduce the operating time on batteries by up to half.
-
Pilot holes: always make thin pilot holes for screws. This will prevent hard furniture boards from cracking and ensure that the lock does not shift by even a millimeter during tightening.
Knowledge worth sharing 😉
Preparing this precise information took us a lot of time, but we do it with passion to make it easier for everyone to find the best solution. If you find our tips helpful, please share the link to this FAQ page or our page about invisible cabinet locks with your friends or on social media.
Your share is the best way to say thank you. Thank you!
Download leaflet of furniture locks for RFID cards and fobs


 Polski
 English
 Deutsch
 Eesti
Eesti